Tutorial 01: Basics Tutorial 03: Adding color   


Tutorial 02: Your first polygon

This tutorial assumes, that you have basic knowledge of HTML, CSS and JavaScript. The complete example page is written subsequent and divided into parts with regards to content. After each code block, a description follows.
In this lesson you will learn how to embed Three.js into your web page and how to draw simple shapes.
To see the lessons result, you can jump to the live example
 
WebGL
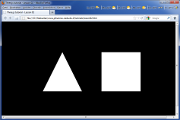
Screenshot of the WebGL renderer
Chrome Firefox Safari Opera Internet Explorer
WebGL
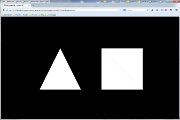
Screenshot of the canvas renderer
Advertisement
 
Tutorial
  1 <!DOCTYPE html> 
  2 <!-- The previous line tells the browser, that the page uses the HTML5 standard. --> 
  3  
  4 <html>
  5     <head>
  6         <title>Three.js tutorial - Lesson 02</title> 
  7         <meta http-equiv="content-type" content="text/html; charset=ISO-8859-1"> 
  8  
  9         <!-- The following meta line optimizes the site for mobile devices. It sets the viewport size 
 10         to the screen size, so it will be displayed maximized, but unscaled. --> 
 11         <meta name="viewport" content="width=device-width, height=device-height, initial-scale=1"> 
 12         <style type="text/css"> 
 13             body { 
 14                 /* Set the background color of the HTML page to black */ 
 15                 background-color: #000000; 
 16  
 17                 /* Hide oversized content. This prevents the scroll bars. */ 
 18                 overflow: hidden; 
 19             } 
 20         </style> 
 21         <!-- Include Three.js libraries --> 
 22         <script src="../js/r69/three.js"></script> 
 23         <script src="../js/r69/Detector.js"></script> 
 24         <script src="../js/r69/CanvasRenderer.js"></script> 
 25         <script src="../js/r69/Projector.js"></script> 
 26     </head> 
 27     <body>
 28         <!-- This is the DIV element which will contain the WebGL canvas. To be identifiable lateron, 
 29         the id 'WebGLCanvas' is applied to it. --> 
 30         <div id="WebGLCanvas"> 
 31  
 32         <!-- This JavaScript block encloses the Three.js commands --> 
 33         <script> 
 34             // Global scene object 
 35             var scene; 
 36  
 37             // Global camera object 
 38             var camera; 
 39  
 40             // Initialize the scene 
 41             initializeScene(); 
 42  
 43             // Render the scene (map the 3D world to the 2D scene) 
 44             renderScene(); 
 45  
 46             /** 
 47              * Initialze the scene. 
 48              */ 
 49             function initializeScene(){ 
 50                 // Check whether the browser supports WebGL. If so, instantiate the hardware accelerated 
 51                 // WebGL renderer. For antialiasing, we have to enable it. The canvas renderer uses 
 52                 // antialiasing by default. 
 53                 // The approach of multiple renderers is quite nice, because your scene can also be 
 54                 // viewed in browsers, which don't support WebGL. The limitations of the canvas renderer 
 55                 // in contrast to the WebGL renderer will be explained in the tutorials, when there is a 
 56                 // difference. 
 57                 if(Detector.webgl){ 
 58                     renderer = new THREE.WebGLRenderer({antialias:true}); 
 59  
 60                 // If its not supported, instantiate the canvas renderer to support all non WebGL 
 61                 // browsers 
 62                 } else { 
 63                     renderer = new THREE.CanvasRenderer(); 
 64                 } 
 65  
 66                 // Set the background color of the renderer to black, with full opacity 
 67                 renderer.setClearColor(0x000000, 1); 
 68  
 69                 // Get the size of the inner window (content area) to create a full size renderer 
 70                 canvasWidth = window.innerWidth; 
 71                 canvasHeight = window.innerHeight; 
 72  
 73                 // Set the renderers size to the content areas size 
 74                 renderer.setSize(canvasWidth, canvasHeight); 
 75  
 76                 // Get the DIV element from the HTML document by its ID and append the renderers DOM 
 77                 // object to it 
 78                 document.getElementById("WebGLCanvas").appendChild(renderer.domElement); 
 79  
 80                 // Create the scene, in which all objects are stored (e. g. camera, lights, 
 81                 // geometries, ...) 
 82                 scene = new THREE.Scene(); 
 83  
 84                 // Now that we have a scene, we want to look into it. Therefore we need a camera. 
 85                 // Three.js offers three camera types: 
 86                 //  - PerspectiveCamera (perspective projection) 
 87                 //  - OrthographicCamera (parallel projection) 
 88                 //  - CombinedCamera (allows to switch between perspective / parallel projection 
 89                 //    during runtime) 
 90                 // In this example we create a perspective camera. Parameters for the perspective 
 91                 // camera are ... 
 92                 // ... field of view (FOV), 
 93                 // ... aspect ratio (usually set to the quotient of canvas width to canvas height) 
 94                 // ... near and 
 95                 // ... far. 
 96                 // Near and far define the cliping planes of the view frustum. Three.js provides an 
 97                 // example (http://mrdoob.github.com/three.js/examples/ 
 98                 // -> canvas_camera_orthographic2.html), which allows to play around with these 
 99                 // parameters. 
100                 // The camera is moved 10 units towards the z axis to allow looking to the center of 
101                 // the scene. 
102                 // After definition, the camera has to be added to the scene. 
103                 camera = new THREE.PerspectiveCamera(45, canvasWidth / canvasHeight, 1, 100); 
104                 camera.position.set(0, 0, 10); 
105                 camera.lookAt(scene.position); 
106                 scene.add(camera); 
107  
108                 // Create the triangle (or any arbitrary geometry). 
109                 // 1. Instantiate the geometry object 
110                 // 2. Add the vertices 
111                 // 3. Define the faces by setting the vertices indices 
112                 var triangleGeometry = new THREE.Geometry(); 
113                 triangleGeometry.vertices.push(new THREE.Vector3( 0.0,  1.0, 0.0)); 
114                 triangleGeometry.vertices.push(new THREE.Vector3(-1.0, -1.0, 0.0)); 
115                 triangleGeometry.vertices.push(new THREE.Vector3( 1.0, -1.0, 0.0)); 
116                 triangleGeometry.faces.push(new THREE.Face3(0, 1, 2)); 
117  
118                 // To color the surface, a material has to be created. If all faces have the same color, 
119                 // the THREE.MeshBasicMaterial fits our needs. It offers a lot of attributes (see 
120                 // https://github.com/mrdoob/three.js/blob/master/src/materials/MeshBasicMaterial.js) 
121                 // from which we need in this lesson only 'color'. 
122  
123                 // Create a white basic material and activate the 'doubleSided' attribute to force the 
124                 // rendering of both sides of each face (front and back). This prevents the so called 
125                 // 'backface culling'. Usually, only the side is rendered, whose normal vector points 
126                 // towards the camera. The other side is not rendered (backface culling). But this 
127                 // performance optimization sometimes leads to wholes in the surface. When this happens 
128                 // in your surface, simply set 'doubleSided' to 'true'. 
129                 var triangleMaterial = new THREE.MeshBasicMaterial({ 
130                     color:0xFFFFFF, 
131                     side:THREE.DoubleSide 
132                 }); 
133  
134                 // Create a mesh and insert the geometry and the material. Translate the whole mesh 
135                 // by -1.5 on the x axis and by 4 on the z axis. Finally add the mesh to the scene. 
136                 var triangleMesh = new THREE.Mesh(triangleGeometry, triangleMaterial); 
137                 triangleMesh.position.set(-1.5, 0.0, 4.0); 
138                 scene.add(triangleMesh); 
139  
140                 // The creation of the square is done in the same way as the triangle, except of the 
141                 // face definition. Instead of using one THREE.Face3, we have to define two 
142                 // THREE.Face3 objects. 
143                 // 1. Instantiate the geometry object 
144                 // 2. Add the vertices 
145                 // 3. Define the faces by setting the vertices indices 
146                 var squareGeometry = new THREE.Geometry(); 
147                 squareGeometry.vertices.push(new THREE.Vector3(-1.0,  1.0, 0.0)); 
148                 squareGeometry.vertices.push(new THREE.Vector3( 1.0,  1.0, 0.0)); 
149                 squareGeometry.vertices.push(new THREE.Vector3( 1.0, -1.0, 0.0)); 
150                 squareGeometry.vertices.push(new THREE.Vector3(-1.0, -1.0, 0.0)); 
151                 squareGeometry.faces.push(new THREE.Face3(0, 1, 2)); 
152                 squareGeometry.faces.push(new THREE.Face3(0, 2, 3)); 
153  
154                 // Create a white basic material and activate the 'doubleSided' attribute. 
155                 var squareMaterial = new THREE.MeshBasicMaterial({ 
156                     color:0xFFFFFF, 
157                     side:THREE.DoubleSide 
158                 }); 
159  
160                 // Create a mesh and insert the geometry and the material. Translate the whole mesh 
161                 // by 1.5 on the x axis and by 4 on the z axis and add the mesh to the scene. 
162                 var squareMesh = new THREE.Mesh(squareGeometry, squareMaterial); 
163                 squareMesh.position.set(1.5, 0.0, 4.0); 
164                 scene.add(squareMesh); 
165             } 
166  
167             /** 
168              * Render the scene. Map the 3D world to the 2D screen.
169              */ 
170             function renderScene(){ 
171                 renderer.render(scene, camera); 
172             } 
173         </script> 
174     </body> 
175 </html>
Live example