| Tutorial 02: Your first polygon | Tutorial 04: Rotation | ||
Tutorial 03: Adding color
This tutorial assumes, that you have read and understood lesson 02.This lesson teaches you how to apply vertex and face color to your geometry.
To see the lessons result, you can jump to the live example
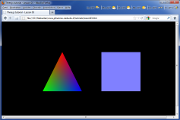 Screenshot of the WebGL renderer |
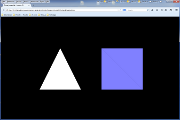 Screenshot of the canvas renderer |