Tutorial 06: Texture mapping Tutorial 08: Blending   


Tutorial 07: Texture filtering, lighting and keyboard

This tutorial assumes, that you have read and understood lesson 06.
This lesson teaches you how to apply texture filtering, add different types of light and handle keyboard input. Unfortunately, we will discover another limitation of the canvas renderer: Lights!
To see the lessons result, you can jump to the live example
 
WebGL
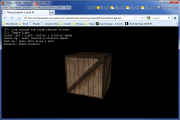
Screenshot of the WebGL renderer
Chrome Firefox Safari Opera Internet Explorer
WebGL
Screenshot of the canvas renderer
Advertisement
 
Tutorial
  1 <!DOCTYPE html> 
  2 <!-- The previous line tells the browser, that the page uses the HTML5 standard. --> 
  3  
  4 <html>
  5     <head>
  6         <title>Three.js tutorial - Lesson 07</title> 
  7         <meta http-equiv="content-type" content="text/html; charset=ISO-8859-1"> 
  8  
  9         <!-- The following meta line optimizes the site for mobile devices. It sets the viewport size 
 10         to the screen size, so it will be displayed maximized, but unscaled. --> 
 11         <meta name="viewport" content="width=device-width, height=device-height, initial-scale=1"> 
 12         <style type="text/css"> 
 13             body { 
 14                 /* Set the background color of the HTML page to black */ 
 15                 background-color: #000000; 
 16  
 17                 /* Hide oversized content. This prevents the scroll bars. */ 
 18                 overflow: hidden; 
 19  
 20                 /* Define the font and the color for the usage, which is an ordinary HTML overlay. */ 
 21                 font-family: Monospace; 
 22                 color: white; 
 23             } 
 24         </style> 
 25         <!-- Include Three.js libraries --> 
 26         <script src="../js/r69/three.js"></script> 
 27         <script src="../js/r69/Detector.js"></script> 
 28         <script src="../js/r69/CanvasRenderer.js"></script> 
 29         <script src="../js/r69/Projector.js"></script> 
 30     </head> 
 31     <body>
 32         <!-- Create a DIV element, which will be shown over the WebGL canvas. The last line 
 33         ("Renderer: ") will be completed either by "WebGL Renderer" or by "Canvas Renderer". --> 
 34         <div id="overlaytext" style="position: absolute; top: 10px; left: 10px"> 
 35             'F': Loop through the three texture filters (only for WebGL renderer)<br/> 
 36             'L': Toggle light (only for WebGL renderer)<br/> 
 37             Cursor left / right: Control y rotation speed<br/> 
 38             Cursor up / down: Control x rotation speed<br/> 
 39             Page up / down: Move along z axis<br/> 
 40             Renderer:  
 41         </div> 
 42  
 43         <!-- This is the DIV element which will contain the WebGL canvas. To be identifiable lateron, 
 44         the id 'WebGLCanvas' is applied to it. --> 
 45         <div id="WebGLCanvas"> 
 46  
 47         <!-- This JavaScript block encloses the Three.js commands --> 
 48         <script> 
 49             // Global scene object 
 50             var scene; 
 51  
 52             // Global camera object 
 53             var camera; 
 54  
 55             // x and y rotation 
 56             var xRotation = 0.0; 
 57             var yRotation = 0.0; 
 58  
 59             // Rotation speed around x and y axis 
 60             var xSpeed = 0.0; 
 61             var ySpeed = 0.0; 
 62  
 63             // Translation along the z axis 
 64             var zTranslation = 0.0; 
 65  
 66             // The x and y speed is controlled by the cursor keys. 
 67             // The translation on the z axis by 'Page up / down'. 
 68             // 'crateTexture' is the texture object. We set it global, to modify it's attributes 
 69             // lateron. 
 70             // 'textureFilter' will have three states (0, 1 or 2), controlling the current texture 
 71             // filtering (nearest, linear or mipmapped). 
 72             // The next two objects hold two different kinds of light: Ambient and directional light. 
 73             // 'enableLights' is the flag, which is switched by the key 'f'. 
 74  
 75             // Texture and flag for current texture filter 
 76             var crateTexture; 
 77             var textureFilter = 0; 
 78  
 79             // Flag for toggling light 
 80             var lightIsOn = true; 
 81  
 82             // Initialize the scene 
 83             initializeScene(); 
 84  
 85             // Animate the scene 
 86             animateScene(); 
 87  
 88             /** 
 89              * Initialze the scene. 
 90              */ 
 91             function initializeScene(){ 
 92                 // Check whether the browser supports WebGL. If so, instantiate the hardware accelerated 
 93                 // WebGL renderer. For antialiasing, we have to enable it. The canvas renderer uses 
 94                 // antialiasing by default. 
 95                 // The approach of multiplse renderers is quite nice, because your scene can also be 
 96                 // viewed in browsers, which don't support WebGL. The limitations of the canvas renderer 
 97                 // in contrast to the WebGL renderer will be explained in the tutorials, when there is a 
 98                 // difference. 
 99                 webGLAvailable = false; 
100                 if(Detector.webgl){ 
101                     renderer = new THREE.WebGLRenderer({antialias:true}); 
102                     webGLAvailable = true; 
103                     document.getElementById("overlaytext").innerHTML += "WebGL Renderer"; 
104  
105                 // If its not supported, instantiate the canvas renderer to support all non WebGL 
106                 // browsers 
107                 } else { 
108                     renderer = new THREE.CanvasRenderer(); 
109                     document.getElementById("overlaytext").innerHTML += "Canvas Renderer"; 
110                 } 
111  
112                 // Set the background color of the renderer to black, with full opacity 
113                 renderer.setClearColor(0x000000, 1); 
114  
115                 // Get the size of the inner window (content area) 
116                 // Reduce the canvas size a little bit to prevent scrolling the whole window 
117                 // content in Firefox while rotating the cube with the keys. 
118                 canvasWidth = window.innerWidth - 10;
119                 canvasHeight = window.innerHeight - 20;
120  
121                 // Set the renderers size to the content areas size 
122                 renderer.setSize(canvasWidth, canvasHeight); 
123  
124                 // Get the DIV element from the HTML document by its ID and append the renderers DOM 
125                 // object to it 
126                 document.getElementById("WebGLCanvas").appendChild(renderer.domElement); 
127  
128                 // Create the scene, in which all objects are stored (e. g. camera, lights, 
129                 // geometries, ...) 
130                 scene = new THREE.Scene(); 
131  
132                 // Now that we have a scene, we want to look into it. Therefore we need a camera. 
133                 // Three.js offers three camera types: 
134                 //  - PerspectiveCamera (perspective projection) 
135                 //  - OrthographicCamera (parallel projection) 
136                 //  - CombinedCamera (allows to switch between perspective / parallel projection 
137                 //    during runtime) 
138                 // In this example we create a perspective camera. Parameters for the perspective 
139                 // camera are ... 
140                 // ... field of view (FOV), 
141                 // ... aspect ratio (usually set to the quotient of canvas width to canvas height) 
142                 // ... near and 
143                 // ... far. 
144                 // Near and far define the cliping planes of the view frustum. Three.js provides an 
145                 // example (http://mrdoob.github.com/three.js/examples/ 
146                 // -> canvas_camera_orthographic2.html), which allows to play around with these 
147                 // parameters. 
148                 // The camera is moved 10 units towards the z axis to allow looking to the center of 
149                 // the scene. 
150                 // After definition, the camera has to be added to the scene. 
151                 camera = new THREE.PerspectiveCamera(45, canvasWidth / canvasHeight, 1, 100); 
152                 camera.position.set(0, 0, 6); 
153                 camera.lookAt(scene.position); 
154                 scene.add(camera); 
155  
156                 // Create the cube 
157                 var boxGeometry = new THREE.BoxGeometry(2.0, 2.0, 2.0); 
158  
159                 // When the CanvasRenderer is used, you will see, that the texture has some distortions. 
160                 // To get rid of this, you only have to increase the number of cube segments. The 
161                 // WebGLRenderer doesn't needs this workaround. 
162                 //var boxGeometry = new THREE.BoxGeometry(2.0, 2.0, 2.0, 4, 4, 4); 
163  
164                 // Load an image as texture 
165                 crateTexture = new THREE.ImageUtils.loadTexture("Crate.jpg"); 
166  
167                 // Create a material, which contains the texture. 
168                 // Unfortunately, the CanvasRenderer doesn't support MeshLambertMaterial in combination 
169                 // with Textures. Otherwise, the MeshBasicMaterial doesn't support lighting. As 
170                 // compromise, the CanvasRenderer will show the texture without lighting via 
171                 // MeshBasicMaterial. 
172                 // Activate the 'doubleSided' attribute to force the rendering of both sides of each 
173                 // face (front and back). This prevents the so called 'backface culling'. Usually, 
174                 // only the side is rendered, whose normal vector points towards the camera. The other 
175                 // side is not rendered (backface culling). But this performance optimization sometimes 
176                 // leads to wholes in the surface. When this happens in your surface, simply set 
177                 // 'doubleSided' to 'true'. 
178                 var boxMaterial = new THREE.MeshLambertMaterial({ 
179                     map:crateTexture, 
180                     side:THREE.DoubleSide 
181                 }); 
182                 if(!webGLAvailable){ 
183                     boxMaterial = new THREE.MeshBasicMaterial({ 
184                         map:crateTexture, 
185                         side:THREE.DoubleSide 
186                     }); 
187                 } 
188  
189                 // Create a mesh and insert the geometry and the material. Translate the 
190                 // whole mesh by 'zTranslation' units on the z axis. Finally add the mesh  
191                 // to the scene. 
192                 boxMesh = new THREE.Mesh(boxGeometry, boxMaterial); 
193                 boxMesh.position.set(camera.position.x, camera.position.y, camera.position.z); 
194                 scene.add(boxMesh); 
195  
196                 // Ambient light has no direction, it illuminates every object with the same 
197                 // intensity. If only ambient light is used, no shading effects will occur. 
198                 var ambientLight = new THREE.AmbientLight(0x101010, 1.0); 
199                 scene.add(ambientLight); 
200  
201                 // Directional light has a source and shines in all directions, like the sun. 
202                 // This behaviour creates shading effects. 
203                 directionalLight = new THREE.DirectionalLight(0xffffff, 1.0); 
204                 directionalLight.position.set(0.0, 0.0, 1.0); 
205                 scene.add(directionalLight); 
206  
207                 // Add a listener for 'keydown' events. By this listener, all key events will be 
208                 // passed to the function 'onDocumentKeyDown'. There's another event type 'keypress'. 
209                 // It will report only the visible characters like 'a', but not the function keys 
210                 // like 'cursor up'. 
211                 document.addEventListener("keydown", onDocumentKeyDown, false); 
212             } 
213  
214             /** 
215              * This function is called, when a key is oushed down.
216              */ 
217             function onDocumentKeyDown(event){ 
218                 // Get the key code of the pressed key 
219                 var keyCode = event.which; 
220  
221                 // 'F' - Toggle through the texture filters 
222                 if(keyCode == 70){ 
223                     // The CanvasRenderer doesn't support texture filters. 
224                     switch(textureFilter){ 
225                         case 0: 
226                             crateTexture.minFilter = THREE.NearestFilter; 
227                             crateTexture.magFilter = THREE.NearestFilter; 
228                             textureFilter = 1; 
229                             break; 
230                         case 1: 
231                             crateTexture.minFilter = THREE.LinearFilter; 
232                             crateTexture.magFilter = THREE.LinearFilter; 
233                             textureFilter = 2; 
234                             break; 
235                         case 2: 
236                             crateTexture.minFilter = THREE.LinearFilter; 
237                             crateTexture.magFilter = THREE.LinearMipMapNearestFilter; 
238                             textureFilter = 0; 
239                             break; 
240                     }; 
241                     crateTexture.needsUpdate = true; 
242  
243                 // 'L' - Toggle light 
244                 } else if(keyCode == 76){ 
245                     // If we would just remove the lights from the scene, or set the lights to 
246                     // invisible, we would get a black cube due to the MeshLambertMaterial (it needs 
247                     // light). So we just switch the material to toggle the light 
248                     if(lightIsOn){ 
249                         boxMesh.material = new THREE.MeshBasicMaterial({ 
250                             map:crateTexture, 
251                             side:THREE.DoubleSide 
252                         }); 
253                         lightIsOn = false; 
254  
255                     } else { 
256                         if(webGLAvailable){ 
257                             boxMesh.material = new THREE.MeshLambertMaterial({ 
258                                 map:crateTexture, 
259                                 side:THREE.DoubleSide 
260                             }); 
261                         } else { 
262                             boxMesh.material = new THREE.MeshBasicMaterial({ 
263                                 map:crateTexture, 
264                                 side:THREE.DoubleSide 
265                             }); 
266                         } 
267                         lightIsOn = true; 
268                     } 
269                     boxMesh.material.needsUpdate = true; 
270  
271                 // Cursor up 
272                 } else if(keyCode == 38){ 
273                     xSpeed -= 0.01; 
274  
275                 // Cursor down 
276                 } else if(keyCode == 40){ 
277                     xSpeed += 0.01; 
278  
279                 // Cursor left 
280                 } else if(keyCode == 37){ 
281                     ySpeed -= 0.01; 
282  
283                 // Cursor right 
284                 } else if(keyCode == 39){ 
285                     ySpeed += 0.01; 
286  
287                 // Page up 
288                 } else if(keyCode == 33){ 
289                     zTranslation -= 0.2; 
290  
291                 // Page down 
292                 } else if(keyCode == 34){ 
293                     zTranslation += 0.2; 
294                 } 
295             } 
296  
297             /** 
298              * Animate the scene and call rendering. 
299              */ 
300             function animateScene(){ 
301                 directionalLight.position = camera.position; 
302              
303                 // Update and set the rotation around x and y axis 
304                 xRotation += xSpeed; 
305                 yRotation += ySpeed; 
306                 boxMesh.rotation.set(xRotation, yRotation, 0.0); 
307  
308                 // Apply the the translation along the z axis 
309                 boxMesh.position.z = zTranslation; 
310  
311                 // Define the function, which is called by the browser supported timer loop. If the 
312                 // browser tab is not visible, the animation is paused. So 'animateScene()' is called 
313                 // in a browser controlled loop. 
314                 requestAnimationFrame(animateScene); 
315  
316                 // Map the 3D scene down to the 2D screen (render the frame) 
317                 renderScene(); 
318             } 
319  
320             /** 
321              * Render the scene. Map the 3D world to the 2D screen.
322              */ 
323             function renderScene(){ 
324                 renderer.render(scene, camera); 
325             } 
326         </script> 
327     </body> 
328 </html>
Live example