| Tutorial 04: Rotation | Tutorial 06: Texture mapping | ||
Tutorial 05: 3D shapes
This tutorial assumes, that you have read and understood lesson 04.This lesson teaches you how to create 3-dimensional objects.
To see the lessons result, you can jump to the live example
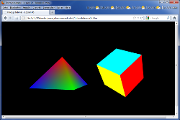 Screenshot of the WebGL renderer |
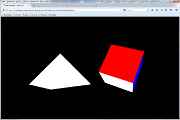 Screenshot of the canvas renderer |